Continuing on on my quest to catch up with uploading images, here are some from a small visit to RMNP in fall. I described one image from this same visit a while ago and I still owe you many waterfall images from that day. The images below are from a little grove of aspen trees that is near the Fall River road. The bark on the trunks of these trees gets eaten by the many elk (basically very large dear for those not familiar with these animals - see an image of a few here on my flickr stream) that reside in these valleys which is why you see the darker area stop at a certain height.
Assembled from 9 images at 70 mm, f/16, 1/30s, ISO 200.
It was raining when I was shooting these images and it was a real challenge keeping my gear dry. I put a black and white version of this image here. As always, clicking on the images will take you to a larger version.
This is a closeup shot of some trunks that I thought formed some nice geometric patterns.
Single shot. 70 mm, f/16, 1/30s, ISO 200.
Another closeup but including some more leaves.
Single shot. 70 mm, f/16, 1/25s, ISO 200.
This is a horizontal view of the group of aspen but from much farther away.
Assembled from 9 images at 70 mm, f/11, 1/30s, ISO 200.
From the same position but much longer lens
Assembled from 9 images at 160 mm, f/11, 1/30s, ISO 200.
After wiping the front elements of my lenses dry and packing up, I moved on to a waterfall called the Alluvial Fan that is just up the road from here. More from that place later.
Saturday, February 26, 2011
Friday, February 18, 2011
Monday, February 14, 2011
Cellphone or DSLR?
What do you think? left or right?
I was inspired to post this comparison by shuwenwu's comment on a flickr image of mine. Click for bigger. Of course these are not exactly the same viewpoint but I just wanted to illustrate the amazing results you can get from cellphones. I carry an iPhone nowadays, which has a surprisingly good camera built in. Examples below:
Sunday, February 13, 2011
Winter on the flatirons : visit to Eldorado Canyon State Park
Last weekend we had a lot of snow around here. Very much contrary to this weekend where we are seeing temperatures around 18 C (65 F for those accustomed to more archaic units). As people say in Colorado: "If you don't like the weather, wait one day". I spent some time trudging through the snow in Eldorado Canyon state park (a hidden gem south of Boulder). This park is famous for its climbing on the edges of its flatirons. In winter conditions you'll see hardly anybody in there. I liked the look of the snow on the red rock and the trees so I shot some images there.
This is a view of the main rock formations from the Fowler trail (click for bigger)
Assembled from 9 images shot at 35 mm, f/11, 1/15s. Will print with exquisite detail even as large as most homes' walls.
This is a detail from this view which I liked because of its geometric shapes where the trees reflect the rocks.
Single image at 35 mm, f/11, 1/15s.
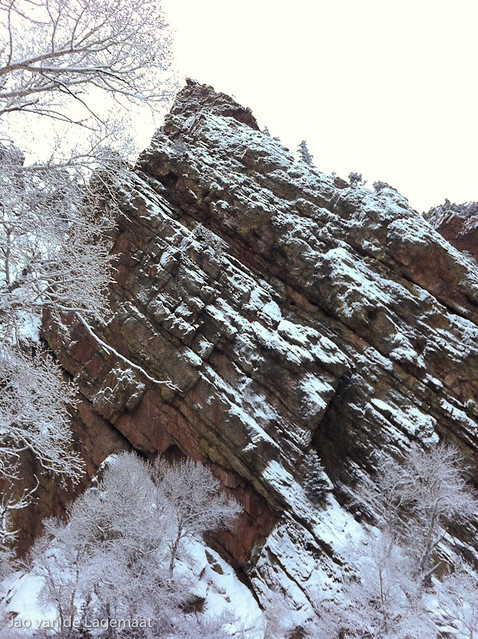
This is my favorite from the hike. a rear view of the rock formations. I composed the image to have the rocks go diagonally on the right to the right corner. This is the image I used in the previous post about the very high level of detail in images such as this.
Assembled from 9 images shot at 50 mm, f/11, 1/15s.
There is a black and white version of this image here.
A look up
Assembled from 9 images shot at 35 mm, f/11, 1/15s.
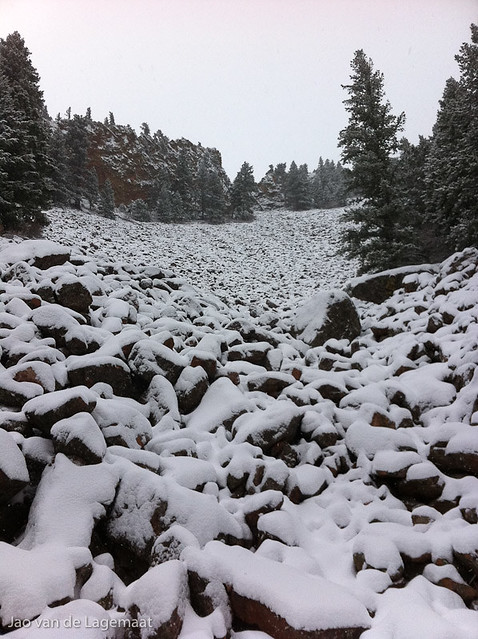
Rockslide
Single image at 11 mm, f/8, 1/25s handheld.
Glassy
Single image at 11 mm, f/5.6, 1/15s handheld.
I also put up a set of images on flickr with some cellphone images in it too for you all to enjoy. The full set on smugmug where you can see larger versions is here.
Sunday, February 6, 2011
Resolution of stitched images revisited
I was recently asked while shooting at Mesa Arch by a fellow photographer who saw me use my wooden panohead jig what using this contraption gained me. I was reminded of this going through some shots from yesterday. I went to Eldorado Canyon state park in the snow storm to shoot some images of the awesome rock formations there (I'll post images later). I compared a guide image with a stitched image and was struck by the amazing amount of extra detail.
Here is the full image to guide you. On the left the guide image, shot at 18 mm, f/11, 1/15s and ISO 200 using my 18-55 mm kit lens. This lens is amazingly sharp if used correctly. On the right, the assembled pano, rendered at 65 MP (Full rendered resolution is about 95 MP, but I rarely render the panos that large) from 9 shots at 48mm and same settings as above. This is a 12 MP Nikon D300.
Guide image. The screenshots below are slightly left of the center.
Of course at this size, there is no way to see any difference. It just illustrates how well this technique works. The guide image is almost identical to the stitched pano zoomed out this far. This is essential to me as it is otherwise very hard to compose shots. In this case, I wanted the lines of the awesome Fountain formation rocks to diagonally go to the right bottom corner. To compare resolution, I upscaled the single shot NEF file to the 65 MP resolution and show the comparison below at 1:1 (click on the image for full resolution - you might have to click again to get it at 1:1 on your screen).
Left: 12 MP image upscaled to 65 MP. Right: 65 MP stitched image of the same composition.
Even at the zoomed out size of the screenshot that I placed inline above, you can see the enormous difference in resolution. Note that if you look at this screenshot 1:1 by clicking on it, you are looking at the equivalent of a 65"x100" print (I am assuming your monitor is about 100 ppi - the reduced size image inline above is equivalent to a 27x42" print). I don't need to tell you how well the stitched image holds up even at that size. Because this is crazily large, I was curious how well this translates to smaller prints. So I downscaled the stitched image to the same resolution as the single 12 MP shot. Again, click to see a 1:1 image.
Left: single 12 MP image. Right: 65 MP stitched image downscaled to 12 MP.
Amazingly, even here you can see better detail in the stitched image. This is happening because of the Bayer mosaic used in the sensor of this camera and some lens softness. It cannot actually record as sharp of an image as it pretends it can, making a downscaled 65 MP image look signifcantly better than a native 12 MP one. Note that the 12 MP image was sharpened appropriately in Lightroom. At the 1:1 size, you are looking at a print of about 28x43" so this is still quite a large print. It is hard to show this on a screen, but when I make test prints from these images at smaller sizes than 28x43", say 16x24" I still see an obvious difference. Of course, to many people that might not be that important. It is also not unlikely that only a fellow photographer will notice it at smaller sizes and normal people would have to be pointed to the difference. To me, the print gains a large amount of presence and reality. This method can be applied to almost any landscape situation - even waterfalls! - to improve resolution.
Saturday, February 5, 2011
New Nikon camera profiles
Eric Chan a while ago posted some new camera matching profiles for certain Nikon cameras. My D300 is one of those. These fix the highlight rendering issues I identified before. I beta tested them a while before they were posted and they are great. Below is an example where it really matters. This is a waterfall I photographed shortly after sunset last weekend. Development is completely standard, except for choosing the camera standard profiles. This image was taken in Eldorado Canyon State park. Click on the image to get a larger version. Focus on the highlight detail in the snowy bank just right of the middle
Nikon D300, ISO 200, 62 mm on Nikon 55-200 f4-5.6, f/16 2.5 sec - tripod.
The left image is the standard camera standard profile in Lightroom. The middle image is the v3 camera standard with -0.5 exposure compensation as required to get the correct rendering. The right one is the Capture NX rendering. You can see that the old profile washes out the highlights quite badly, while the new profile, similar to the CNX rendering gives a lot of detail in the highlights. You cannot correct the left image with highlight recovery or negative exposure compensation and get this detail back.
Of course, the bland, default rendering is not how I develop the image in the end but I just wanted to illustrate the effect of the new profiles.
EDIT. Here is a closeup of the v2 and v3 renderings in the highlight area. The effect is quite major as you can see.
Wednesday, February 2, 2011
80 MP medium format backs
I've been reading with great interest the field report of the new super high resolution Phase One medium format back done by Michael over at Luminous Landscape. This monster gives 80MP real resolution and Michael thinks it is equivalent to drum-scanned 8x10" film. This would be extraordinary if true. Looking at the 1:1 crop and counting pixels, the resolution appears to be similar to or slightly better than what I get stitching (see here, here or here) multiple images from my crop DSLR using my very cheapest kit lens. Of course getting that kind of quality in a single shot is far more convenient than my el cheapo solution as you can compose the shot far better. When I compose, I usually make a guide shot with an equivalent wider angle lens to the final stitched image's viewing angle. This works to a degree but is not perfect. I cannot exactly compose this way. My stitching solution also has trouble with very long lenses as the rotation between frames becomes very small so it works best for wide angles. All in all the new medium format backs are very interesting products. Of course I can't really afford such a machine (44k$ for just this new back, no body and lenses included!) which is probably why I don't get these cameras sent to me by Phase One or any of the other makers for testing. I'd be happy to put one through its paces though! Michael mentions stitching multiple shots from this camera. That concept just blows my mind.
Subscribe to:
Posts (Atom)