Tuesday, October 27, 2009

Assembling a high res image

I was playing with Lightroom 3 beta and discovered that you can now set the background color in a print layout. Excellent! Also, I just happened to generate the following little grid of images that make up a larger panorama. I thought this looked quite nice actually.


I develop these images very flat on purpose to enable better panoramic stitching.

Assembled using hugin and after doing some post treatment just in Lightroom this becomes the following.

This image is 7500x9930 pixels. I have this in a gallery over here, where you can order prints from it. Because of its very high resolution, you can print this image extremely large without loss of quality.
As I promised earlier, when I have time I'll write a little tutorial on how you can do this.

EDIT: playing with the images in LR 3.0 beta, I created the following. This is the top middle image in the collage above but edited individually. This is using the Adobe Standard profile and very modest edits (mostly the blacks and a small amount of added vibrance. I sometimes find such images in my sets that were unintentionally composed quite well.

Warm colors

Thursday, October 22, 2009

More detail

Warning: extreme pixelpeeping alert! You are not going to see any difference if you don't print extremely large.

Now I've give you the disclaimer, I want to say that I am really quite impressed with the new demosaic in Lightroom. I posted one example before where you could see the subtle effect that made the LR 3 images look more natural and allow for larger prints. Here is another example where instead of using the same sharpening settings, I tried to optimize both the LR 2 and the LR 3 version. It is not possible to get the LR 2 version to show anywhere near as much detail as the LR 3 version. The LR 3 version also looks far more natural and less fake. Surprisingly, you can even see the effect a little bit in the scaled down version that I use below as a placeholder. Full-res version in the link where you can really see the difference.


Of course, the left is LR 2 and the right LR 3

Edit: David Naylor comes to very similar conclusions on his blog.

Edit 2: This is the lower right corner of a frame shot using the ultracheap Nikon 18-55 mm kit lens. Parameters: Nikon D300, 18-55mm f3.5-5.6, ISO 200, f8, 1/60 s, handheld. It always amazes me how sharp this cheapo lens can be.

Lightroom 3 new demosaic

It appears the new LR 3 beta includes a new demosaic algorithm and sharpening algorithm. The amount of detail you can extract from the images has gone up by leaps and bounds. You can also go much farther in sharpening than before without the image starting to look like a waterpainting. One nice thing too is that you can also inside LR 3 beta, select the old rendering engine to directly compare. The option is in Develop in the Settings menu, submenu "Process Version". Below is a quick example of the huge difference in detail. This is a scree slope somewhere in Rocky Mountain National Park, so lots and lots of fine detail. The image below shows the LR 2 version. Mouseover for LR 3. You might have to wait a few seconds for the second version to load. Also note that since these are medium-high quality jpegs, some detail is lost in the jpeg conversion.


When I have some time, I'll provide some more analysis. For now, it is looking very very good.

UPDATE: The above image but scaled to 200% Here you see that the new algorithm will really help very large prints (the full image below would correspond to a print of 4x6 feet!. The mouseover version (LR 3) is obviously far better as it doesn't show the weird watercolor effect that you can often get in LR 2.


Here's another example.

Wednesday, October 21, 2009

Lightroom 3 beta

All over the web and finally repeated here (sorry had other stuff to do then post to my blog ;-) ). Check it out.

Mamiya releases new medium format digital camera

And it is relatively affordable: See here. A 22 MP one for about 10k$ and a 28 MP one for 15k$. These are very nice prices compared to the competition in this format. The cameras are compatible with all Mamiya AF lenses of which there are many floating around on ebay, craigslist and of course keh.com. It appears that, like the Leica M9, these cameras output a file format that makes them work directly with Lightroom and other such programs without any updates needed. That is great news and more camera manufacturers should listen to their costumers that generally do not want to be locked into the camera manufacturer's generally crappy software (are you listening Nikon and Canon?). DNG is a great choice for such a file format.

Sunday, October 18, 2009

Colorchecker passport minireview

I got myself one of the new colorchecker passports. This product has three different targets in a little make-up mirror format. There is a classic colorchecker that we all now and love, a large white balance target and a "creative enhancement target". The package also comes with a CD with software that allows you to create calibrated dng profiles for use in Lightroom and ACR. There is even a plugin that works straight from Lightroom that is very handy.


Figure: The colorchecker and the creative target in direct sunlight. I white balanced this image from the neutral patch on the creative target and created a DNG profile that is used to correct the image. The image looks almost identical to the real life colorchecker. On mouse over you will see the rendering using the Adobe Standard profile for this camera (A Nikon D300).

Above, by mousing over the image, one can see the results from me calibrating my main camera. There are clear differences in the rendering of a few of the patches and the overall image appears warmer in the calibrated image than in the standard profile version even though both raw renderings were white balanced on the same patch. This might have to do with the very harsh sunlight at the altitudes here. I get far better skin tone rendering using these new profiles generated from the colorchecker. You could do this before (and I have done it) using a standard colorchecker and DNG profile editor. Strangely enough there are small differences between the profiles generated by the two different methods. Something to check out. What's most important of a card like this is to be able to get an accurate white balance. An example is below. This is a shot in my son's room with light from several compact fluorescent bulbs. The walls are painted lightly blue and my camera just has an extremely hard time measuring white balance correctly. The below shows the shot with default settings in camera and in Lightroom and the mouseover shows the result of balancing using the grey card and using a calibrated profile (less important here).


Figure: my son using automatic white balance and grey card white balance (mouseover). Mouseover this link to see the same but with the Adobe standard profile.

His pajamas of course are deep blue, not muddy cyan. Needless to say that the image that used a greycard for white balance is far better. There is not that much difference between the standard profile and the calibrated profile and there it comes down to taste.

The creative target that is provided (see the right part of the top image) is very handy as it changes both temperature and tint instead of just temperature. I measured the white balance change and in the top row (little portrait icons) of white balance patches, each successive patch shifts the assumed white balance up by about 250K, while the tint shifts by approximately 6. In the landscape row, each successive patch shifts by about 300K, while the tint shifts by about 7.5. You can do the same thing with the white balance quick adjust in Lightroom, but that shifts with larger steps and does not bring the tint along. The creative target on the passport is clearly well thought out in my opinion.

In conclusion, it is clear that using a correct color balance is very important especially in difficult light. You can use the colorchecker to very easily generate calibrated profiles for your camera which can significantly alter your image's appearance in limited circumstances.

Raccoon phase II

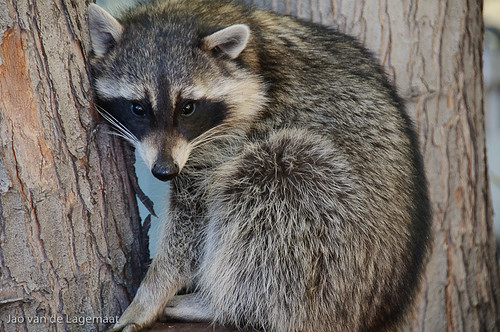
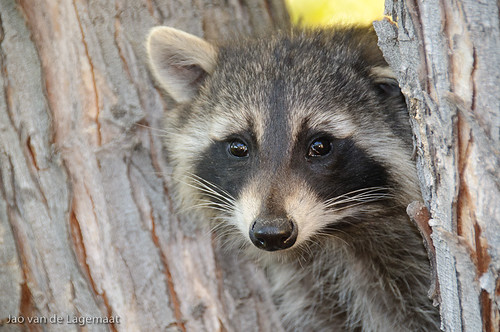
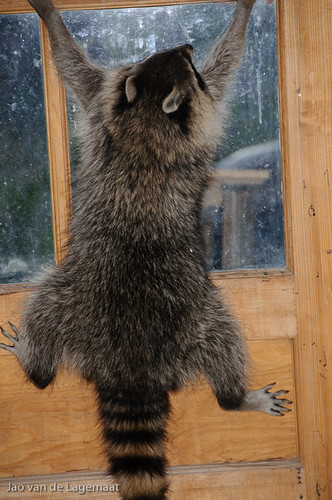
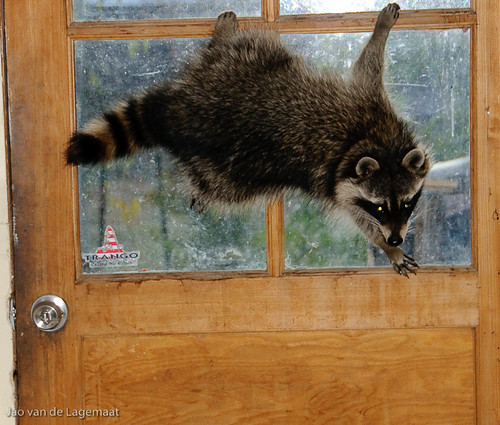
Yesterday, I discovered that the raccoon from the previous post (it is the same one as you can see from his coat "design") had made his home under a nook under one of the subroofs. I got some nice shots from him, but still had to chase him off and make the spot where he was hiding a little unpleasant for him as I don't want him scurrying around where my small kids are playing. These are very cute looking animals but they can often scratch and bite people. This is not good as they sometimes carry rabies and distemper. The garden hose helped and I haven't seen him since he ran off. This is far from the only raccoon in our neighborhood. Neighbors of us were in their livingroom and suddenly noticed eyes staring at them - from the fireplace.

Squatter

2009-10-17 Cute Squatter

Thursday, October 15, 2009

Tuesday, October 13, 2009

Nikon announces new high ISO monster

The D3s. The thing is capable of ISO 102400. The Sample images show amazingly clean ISO 12800. The ISO 102400 I am sure of course is a trick mode (HI 3) that is really ISO 12800 boosted in software. Still the images very impressive as I am sure the price will be. For the rest it is like the old D3. And oh yeah, there is a movie feature which shoots in silly time-limited mjpeg, a codec from the stone age that nobody uses anymore. Why no mpeg4/H264? Now the question is with the D3s and the D3x, where is Nikon's answer to the Canon 5D mk II? The D700x?

Tuesday, October 6, 2009

Nobel Price for physics

Just heard this on the radio this morning. The inventors of the CCD chip, Willard S. Boyle and George E. Smith, won the Nobel price for physics. The CCD chip set of a revolution in digital imaging and scientific sensors. It's hard to overstate its importance for photography. Well deserved if you ask me. They are sharing the price with Charles K. Kao, who won for his work on fiber optics. Also extremely important in today's world for communication and many other applications. In my day to day work, I use both CCDs and fiber optics all the time for scientific research. Interesting to see them both being recognized at the same time.