I thought the original was a little dark especially in the shadowed areas in the sunlit peaks. Also the reds were blowing out of sRGB (making it hard to display in a web browser). This was the real color just being so intense that you need a wide gamut display to actually display it. To compensate, I dialed in a little negative vibrance and saturation, lightened the foreground a tad and replaced the image on my website. The result is below.
Enjoy!
Tuesday, December 28, 2010
Friday, December 24, 2010
Happy Holidays!
From my family to you all!
Taken in Picacho Peak State Park, Arizona March of this year. We brought some very big ladders to put those hats on ;-)
Saturday, December 18, 2010
Wednesday, December 8, 2010
Kawah Ijen at night
I have written about the amazing practice of mining sulfur from volcanoes that happens in Indonesia before. I just came across an amazing series of images posted by The Big Picture that was taken by photographer Olivier Grunewald of one of these operations at night using moonlight. It shows blue flames from burning sulfer and other very strong outerworldly colors. Truly a unique perspective. Check out the gallery here.
Saturday, December 4, 2010
Sky Pond
A while ago (More than three months now) I spent a day photographing Sky Pond and the gorgeous Cathedral Spires that are right above this beautiful lake in Rocky Mountain National Park. To get to Sky Pond before sunrise (a little after 6 am), I had to start hiking at 4 am, which necessitated a 2 am start from home. The hike is very nice, even in the dark and I noticed that there were still many flowers next to the trail. When I got above The Loch, some dawn glow started on the horizon and I snapped a quick cellphone image:
After passing the Lake of glass and climbing up a wet waterfall, I got to Sky Pond which was nicely lit by predawn light.
D300, ISO 200, 11-16 Tokina f2.8 at 11mm, f8.0, 2.5seconds. Single exposure.
A few seconds later, the spires lit up brightly and the mood completely changed,
9 images stitched from a D300 using 18-55mm kit lens at 30mm, ISO 200, f/14 and 0.5s exposure. A 3 stop grad ND was used on the top row of images.
As you can see there is a red glow in the water and the mountain is lit up very brightly. The color you see is almost impossible to reproduce on a standard monitor and using sRGB color spaces. Only when at home I was looking at these images did I discover that there were several climbers at the foot of the Petit Groupon (one of the spires) getting ready to start climbing. They must have spent the night there which is possible if you get a permit from the park service. These spires are a popular climb. In the screenshot below, you can see the climbers as they appear in the stitched image above when zoomed at 1:1 (click on the image to see the full resolution). There is more info in the original images but this is representative of the detail present in the stitched image above. This also gives you an idea of the scale of these mountains.
I went on to shoot some more panos and individual images (all on the smugmug gallery). This was one that I liked in particular because of the glow on the water.
D300, ISO 200, 11-16 Tokina f2.8 at 11mm, f16.0, 1/5s. Single exposure 3 stop grad ND.
Going down from Sky Pond, one comes along a gorgeous waterfall that is strangely unnamed (at least on all the maps). I had some fun shooting all around it. One image that I liked from there was this image of a gnarly root of a twisted pine I came accros with the waterfall in the background.
D300, ISO 200, 11-16 Tokina f2.8 at 11mm, f16.0, 1/5s. Single exposure, 3 stop ND filter.
From the waterfall, there were also several interesting viewpoints of the spires such as this whirlpool:
D300, ISO 200, 11-16 Tokina f2.8 at 13mm, f16.0, 1/6s. Single exposure, 3 stop grad ND filter.
Or this mossy image:
D300, ISO 200, 11-16 Tokina f2.8 at 11mm, f16.0, 1/8s. Single exposure, 3 stop grad ND filter.
It was quite impressive to see the glow on the water in the little stream (Icy Brook). Around the stream there were many flowers still this late in the season. Here is a shot through an opening in the rocks that I liked.
D300, ISO 200, 11-16 Tokina f2.8 at 11mm, f11.0, 5 handheld exposures from 1/50s to 1/3s.
This is a composite of 5 handheld shots (too lazy to take out my tripod again) that I created using enfuse and hugin (to make sure the images are aligned).
Below The Lake of Glass, one has to climb down a slick waterfall for a little and it was here that I came accross a bevy of late season flowers that I photographed in various ways. Here for example are some bluebells and yellow flowers (forgot their name for now) in a crack in the rock.
D300, ISO 200, 11-16 Tokina f2.8 at 15mm, f8.0, 1/40s handheld.
Or these yellow flowers on a ledge
D300, ISO 800, 11-16 Tokina f2.8 at 15mm, f2.8, 1/500s handheld.
Right below the waterfall there was a gorgeous meadow with many photographic opportunities, several of which I took:
D300, ISO 200, 11-16 Tokina f2.8 at 11mm, f16.0, 1/10s, 3 stop grad ND.
Or this view that includes a piece of wood
D300, ISO 200, 11-16 Tokina f2.8 at 11mm, f16.0, 1/10s, 3 stop grad ND.
This hike is highly recommended even if you are not willing to get up as early as I did. It is gorgeous any time of day.
Check out the entire gallery on my smugmug page.
Thursday, December 2, 2010
Mono Lake home to "alien" life
(image NASA)
Mono Lake, well known to photographers for its amazing formations turns out to be home to extraordinary lifeforms that use Arsenic instead of Phospherous in its DNA. I always love it when science and photography intersect. I have not been to Mono Lake yet, but it has been on my list of places to visit for a long time.
Tuesday, October 26, 2010
Monday, October 25, 2010
Lightroom 3.3 and lens profile downloader
Tom Hogarty from Adobe has announced that Lightroom 3.3 is available from their research labs site. It fixes one bug that annoyed me for a while, which is that if you are still using PS CS4, Lightroom would not offer to render as a tiff. This meant that "Edit in PS" would not render the lens correction adjustments built into Lightroom 3. Another thing that Adobe did was to make available a standalone app to download lens profiles from their server. This includes lots of community profiles for lots of exotic lenses. Previously, you had to use PS CS5 to download the profiles. I noticed that all the ones I created and submitted are in there and are highly rated. Making profiles is very easy and my geeky nature couldn't resist generating profiles. One example is a profile for my highly valuable Tokina 11-16 mm lens generated on my D300. You no longer have to email me to get it, but you can download it directly from Adobe! It works great.
Saturday, October 16, 2010
Can you stitch waterfalls?
When you use the stitching method that I do to create high resolution images, one thing to remember is that this works well in relatively stationary subjects. A subject that is not very stationary in general is water. However, when you do the soft water thing by using relatively long shutter speed, you can stitch the resulting images really well. The below image from Beaver Brook in Rocky Mountain National Park (truly a hidden gem - more on that later, too much backlog) was done that way:
This was right around sunset on a very cloudy day, so it was already quite dark in the dense forest and at f13, the shutter was already at 2 seconds. Perfect for such a waterfall. I took 9 images at 50 mm in 3 rows of 3 all 15 degrees apart in both directions and these are the individual images.
I purposefully develop the images in a bland, low contrast, low saturation manner in order to make the image easier to stitch without posterization, blown out colors and such. It gives me more freedom afterwards in other words. The images were exported to 16 bit prophotoRGB tiffs from Lightroom and stitched in hugin (far better than Photoshop for this purpose but much harder to learn) to give the result in the first image above. The field of view is equivalent to a 18mm lens on a crop camera or about 28mm on a full frame camera. Since the resulting image after stitching is more akin to a 4x5 ratio image (there is more overlap vertical than horizontal) It is more instructive to quote the focal length in 4x5 view camera terms, where it is akin to a 115 mm lens. Interestingly, this method allows you to dial in camera movements, and even (sort of) shift the focal plane around if you know what you are doing. It is cumbersome, but helped by the low weight of the total gear and the flexibility in post that you have. It is much harder to visualize the final result though than on a ground glass plate. You do get incredible detail though as the below screenshot demonstrates (click for full resolution:
Just check the guide image to see. Printed at this size, with the detail you see on your screen if you open the above screenshot, the print would be about 70 inches (i.e. 6 feet or about 1.8 meters) high, which is just astonishing I think. This is even more poignant since I did not stitch the image at the full resolution of approximately 70MP in hugin. You will never need it and Smugmug (my hosting service) only goes to 48 MP anyway.
This method is quite a bit cheaper than getting a 10k$ Pentax 645D (that's before the lenses). I would still love one of those though as that is a fantastic camera from everything I read about it.
Finally to answer to the post title is of course a resounding "yes."
Propane campfire!
I am planning to do the white rim (an out and back this time because of the mineral bottom road being destroyed) again in a few weeks with a group of friends. My buddy Craig is one of those guys that loves overengineering everything, and since we are not allowed to have wood fire in Canyonlands (you don't want people to gather the little bit of wood that exists there from dead trees and in summer there is big fire danger), he engineered a propane "camp fire". It's a little much but quite a cool sight! This apparently is revision 2 of this thing.
Tuesday, October 12, 2010
Wednesday, October 6, 2010
Signs
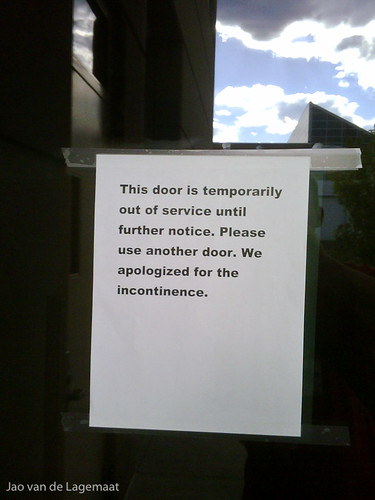
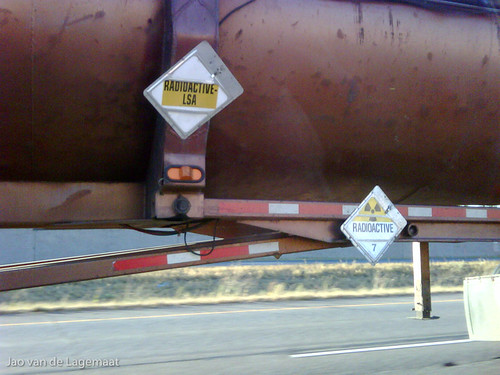
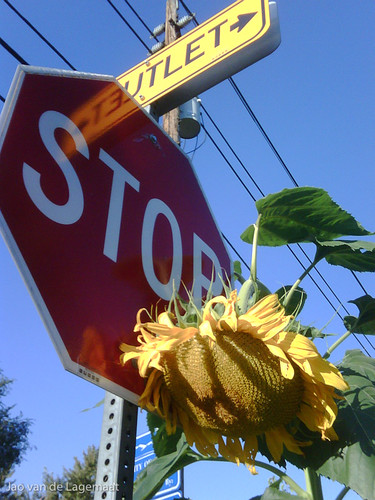
Some silly signs I snapped with my cellphone (a super crappy blackberry)
What did they do to the poor door?
Disturbing truck (nothing but a tarp on top!)
One of our sunflowers and the stop sign at the end of the street.
So that's how you "cover your mouth and/or sneeze" (I always like double entendres, even the non racy ones)
What did they do to the poor door?
Disturbing truck (nothing but a tarp on top!)
One of our sunflowers and the stop sign at the end of the street.
So that's how you "cover your mouth and/or sneeze" (I always like double entendres, even the non racy ones)
Crazy, horrifying
Firefighters let a house burn down because the occupants did not pay their "subscription fee". Just horrifying. Undoubtedly they did not dare call it a tax, so they made "fire protection services" a voluntary subscription. I like Daring Fireball's take on it: "Not from The Onion." Certainly feels that way.
Tuesday, September 28, 2010
Beaver ponds sunset
Several weeks ago I spent a sunset at a set of beaver ponds (lots of mosquitoes) in McCullough Gulch near Breckenridge with my friend Dave. They look out on the aptly named Red Mountain. The beavers were very active so the reflection kept getting "messed up" but we had a fun evening shooting anyway.
Here is a vertical shot. It was stitched from two sets of 9 images at two different exposures combined using a simple gradient layer mask to simulate a big grad neutral density. Click for bigger.
The ponds were really low this time so we had lots of mud in the frame. I like the geometric effect of the fingers of water reaching out to the viewer.
Here is a horizontal rendering. Also stitched from multiple shots. If you go to the bigger version by clicking on it, you can see a beaver swimming in the water in the middle of the reflection of red mountain.
Apple harvest
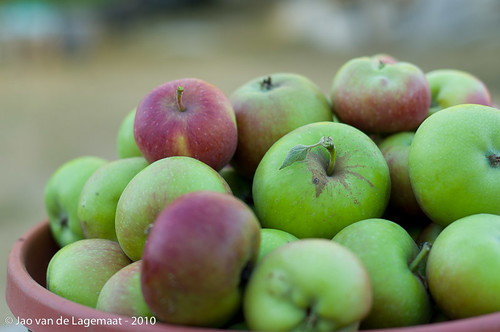
I am woefully behind in posting (I haven't written almost anything about my Australia trip months ago!) but I couldn't pass this up. Our apple trees bore fruit this year and we gathered a lot of apples. Since we don't spray (as a chemist I cannot condone the use of 'chemicals' ;-) ) a lot of them are only good for applesauce but still this is a very fun event. Our property might have been part of an orchard a long time ago, so we have some good tasting apples. We also have planted new fruit trees since we lived here, so we are becoming quite the producer of good stuff.
Monday, September 27, 2010
IE 9 still not color managed?
I don't do windows, so I haven't checked it yet, but apparently the new IE 9 beta still doesn't correctly color manage. It will only take images with spaces different than sRGB and translate them to sRGB. It will NOT use the display profile. That is pathetic and you cannot call it color management. Microsoft claims their color management supports v4 profiles. However, this is meaningless if you don't support the monitor profile as barely any image you will find online will have a v4 profile. Many monitor profiles are v4 though so there it would be useful, if only it actually did anything with it. Contrast this with Firefox, that even though it does not support v4 profiles, will use the monitor profile (as long as it is a v2 profile). Here it makes sense to refer to Microsoft's own document from 14 years ago, which makes clear that a browser when encountering a tagged image should respect the image's profile AND convert to the monitor profile.
Saturday, September 25, 2010
Virgin River Fall
Virgin River in Zion National Park at sunset. Reinterpretation of an image I created in fall 2009. Click on the image for a bigger version. The same image on flickr is here
Sunday, September 19, 2010
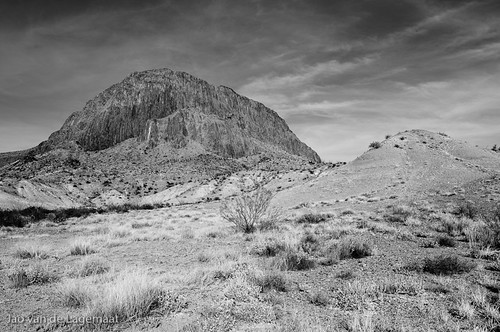
Columnar mountain near Big Bend National Park
This is a redo of an image I made a while ago (I used it in the previous post) from a columnar mountain near the entry to Big Bend National Park. This is done using the new process in LR3 which gives far nicer results. The black and white was done using the channel mixer in Photoshop. Lightroom sometimes creates little halos around regions of one color where they quickly transition into another. The Photoshop channel mixer does not have this issue. This was a problem around the red mountain.
Paris, Texas
Although titled Paris, this post is actually about Terlingua, Texas.
Our cabin's number in Terlingua.
We watched the outstanding Wim Wenders movie, Paris, Texas a few days ago (on streaming Netflix!). This is a superb movie that is highly recommended to people interested in photography. Every shot is beautifully composed with respect to color and composition. Just great. The music (mostly haunting slide guitar melodies) in it was done by Ry Cooder and I have had it for years. One of the things I never realized is that the movie starts in Terlingua, Texas, a place we visited a few years ago. This point in the movie is also the first time you hear the Ry Cooder song. This is interesting as when we stayed the night in Terlingua, the cabin next to us was occupied by a band from Austin.
The guitar player of this band (sorry didn't take his picture and I don't remember their name) actually did a really good rendition of Ry Cooder's Paris, Texas music. I never realized how appropriate that was until I rewatched the movie. I linked the South West Texas thing with the movie of course, but had not linked Terlingua with the movie. Funny.
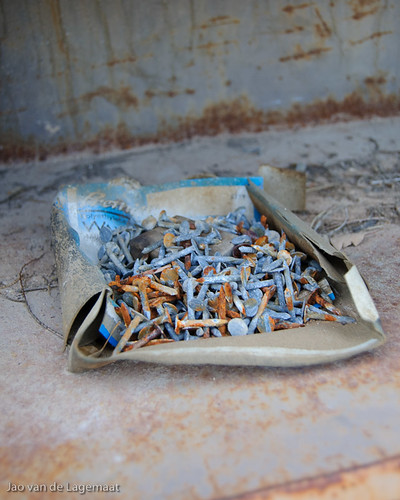
Rusty nails in Terlingua.
Terlingua's really nice ghost town cemetery:
EDIT: Should have done this before, but you can find the opening scenes here on youtube. The scene that shows that we are in Terlingua here comes right after this scene. The landscape you see in the beginning looks like it was filmed in Big Bend National Park. A really amazing place. Terlingua is at the west entrance to the park.
Sunday, August 29, 2010
Mount Evans/Summit Lake
In recent weeks, I went out twice in the evening up to Mount Evans to do a sunset at Summit Lake. The geography of this place is not right for good Alpenglow, but under the right conditions (as you'll see below) you can get glowing clouds that bathe the entire place in crazy light. I've never seen pictures like this from this place before so this mostly was a gamble on my part. This condition only happened the second time I went there and lasted only a few minutes. It was spectacular nevertheless. I got good shots both times that I really like and I'll share them with you below. Click on them to see them in the gallery. You can also visit a set on flickr.
Blue and yellow
ISO 200, 11mm, f/16, 3.0 secs
Yellow blankets
ISO 200, 16mm, f/16, 4.0 secs, 3 stops hard graduated ND.
King's crown
ISO 200, 11mm, f/16, 25.0 secs, 3 stops hard graduated ND.
This was one of my two favorites from the first evening I went there. The King's crown flowers are deeply red colored (not visible in this scaled down copy, but will be if you order a print as the full resolution of the image will be used. My second favorite was this rock shaped like a bird:
ISO 200, 11mm, f/16, 30.0 secs, 3 stops hard graduated ND.
The shutter is much longer here because it was getting dark very rapidly.
Rolling clouds
ISO 800, 11mm, f/16, 30.0 secs, 3 stops hard graduated ND.
Far after sunset.
The second time I went there as I said, the conditions were right for a glowing sunset. Here is my favorite.
Assembled from 9 images at ISO 200, 35mm, f/16, 0.8 secs, 3 stops hard graduated ND in the top row of shots.
This will print well even wall sized. There is also a panoramic version of this here that I use as a backdrop on my monitor.
This is a detail from the above panorama that I liked.
ISO 200, 35mm, f/16, 0.8 secs
A few minutes later it looked like this:
Assembled from 12 images at ISO 200, 30mm, f/16, 5 secs, 3 stops hard graduated ND in the top row of shots.
This is an image focusing on the reflection you can also see in the above image:
Assembled from 8 images at ISO 200, 30mm, f/16, 5 secs.
All in all this was a very productive two evenings. I have far more interesting shots from this place than I put in the gallery but I did not want to overwhelm you.
£9,500 toilet?
Is it some sort of commentary on modern society that a toilet (interesting Delft blue motif BTW) that John Lennon used for a few years and got rid off by giving it to his builder to use as a plant pot sold for more than a rare and famous Lennon/Ono album from his collection. Are celebrities venerated for the right reasons?
Wednesday, August 25, 2010
New Layout
As you might have noticed, I did some major updates to the page layout on this site. The main change is that I flipped around the color scheme from what it was and changed the banner graphic to an image from sunrise on the Cathedral Spires in Rocky Mountain National Park. I started from a blogger supplied template that I did some major hacking on to make it work for a photography website. I don't want tiny columns, and the sans serif should be Helvetica, not the ugly arial clone that is generally used for this purpose. I also added some drop shadows here and there.
Jpeg quality comparison
To my shame I notice that I neglected to link earlier to this excellent analysis by Jeffrey Friedl on the effect of the jpeg quality setting in the Lightroom export module. If you use Lightroom and export images to the web, it would be well worth your time to read this article and check out the comparisons.
Monday, August 23, 2010
Technology leads to people doing stupid things?
I came across an interesting article in the NYT. Apparently more and more people are purely relying on technology when they go into the wilderness. Not even taking essentials such as water, but taking their cellphones, GPSs and sattelite location devices. The article is a fun, but sad, read. Lost hikers asking rescue services whether they could bring them some hot chocolate. Hikers in the Grand Canyon pressing the "rescue me" button on their satellite devices because the water tasted salty. Technology is a good thing I think overall, but you should not neglect the basics and be as self reliant as you can. I go out a lot into the wilderness, but I am always prepared. It is not that hard. Just plan.
Saturday, August 21, 2010
Friday, August 20, 2010
Lightroom bad highlight rendering
Lightroom 3 (I am using 3.2 RC) has some superb rendering nowadays. Lots of detail, pleasing grain behavior, great noise reduction and more. I am generally very happy with it. There is one area where it can use more work and I am not the only one to think that. I ran into this again recently in the below shot of a glassblower at a county fair. If you mouse over this image, you will see the rendering of the same raw file that is obtained from Nikon's capture NX. Pay attention to the flame.
Mouse over this link to see the image using the Adobe Standard profile
Clearly, Nikon's capture does a far better job creating a smooth transition in the highlight area of this image. The Lightroom version has two ugly posterized step transitions in it. Clearly it is not dealing well with areas that are blown out in one or more channels of the raw file. If you try different camera profiles in LR, you will get different highlight posterization but none as good as the Nikon Capture example. This is also often observed in images of setting suns and such where you will often see a weird halo around the sun. This is the same thing as was observed in the article I linked to above.
Of course, I would not want to do lots of work in Capture NX as that program has a horrid interface and I do not always like the color rendering, but clearly this is an area where Lightroom/ACR could improve.
EDIT: I added a mouse over link to show the image when using Adobe's Standard profile. It is better than the other profiles Adobe offers or one created using the profile editor or the Passport software, but it still does not do as smooth a highlight as Nikon's software.
EDIT 2/5/11. This issue has now been fixed by Adobe.
Monday, August 9, 2010
50 year anniversary
This month it was 50 years ago that Longs peak's famous east face diamond was first scaled by Dave Rearick and his partner Bob Kamps. The radio had a story on it this morning with interviews with the climbers and here is a nice account on the successful attempt. At the time, the climb was considered so dangerous that the parks service simply did not allow anyone to try. Kamps and Rearick obtained special permission. In honor of the anniversary here are some pictures I took of Longs Peak1 a while ago.
This is standing below the east face. I can't imagine climbing this thing.
A more traditional view standing on the other side of the lake:
Here are more images. I wrote about the photo excursion that yielded these images some time ago.
1It always bothered me that the official spelling omits the apostrophe as the USGS mandates for most place names named after somebody.
Saturday, July 31, 2010
Mayflower Gulch revisited
I revisited Mayflower Gulch last weekend. I went there two years ago or so with my friends Ben and Dave. Ben has this extraordinary picture in his gallery from this place (middle image on this page). I did not come accross a similar image this time, but I am still happy with the images I did capture. I posted two images before from this trip. The nice thing about this place is that the 4x4 road goes quite close to the bowl but very few people are there even in the weekend except maybe a few photographers. I did this easily in my Subaru Legacy from the trailhead to the spot of the old mining camp. A compact car would have more trouble getting up there. I highly recommend this place for a sunset outing.
This is the view from the point in the road where one parks and starts hiking to find good spots.
As you can see the clouds were quite threatening and the weather could have gone either way. In the end, I got a few minutes of good sunset light. Clicking on the images will get you larger versions of the images on my smugmug site. Use the back button to get back to this post.
This is the view through the window in one of the cabins you saw in the previous image
Another window view looking at the second cabin
The wind was blowing quite hard this day, so I had to shoot at quite high ISO to keep the flowers from blurring completely while still keeping enough depth of field. Most of the following images were done at ISO 800 and f/22.
Yellow flowers and sunset light on the mountain range
Pink paintbrushes
Elephant trunk flowers
Mossy Waterfall
(There is a version without light on the mountains here)
Looking back at the sunset
At this point, the sun had set and the wind completely died down, which allowed me to use low ISOs again. However, the light was not as nice anymore
Mossy fall 2
Asteraceae
Subscribe to:
Posts (Atom)