Thursday, July 31, 2008

The new grad ND tool

Lightroom 2.0 now has a new tool that allows for the very easy creation of simulated graduated neutral density filters. I used to do this all the time in Photoshop, but now we can do this far faster and far more convenient in Lightroom. Below I discuss an example of its use mixed with the new camera profiles. To prime you all, here is an the before/after view (larger in the link):


As you can see the left image is the default ACR 4.4 rendering (I only rotated it 1.5 degrees or so to level the horizon and upped the blacks). This image was taken right after sunset in Canyonlands National Park using my super backpacking friendly D50. On the right the same image, but with the camera landscape profile applied and two grad NDs. I also changed the white balance to cloudy. As you can see. Left - quite boring. Right - very nice saturated colors. The grad NDs can be applied by clicking on the little icon that looks like an actual grad ND filter. Without the grad ND filters, the image looks like this now:


First I applied a quick transition +0.8 exposure grad ND as in the image below.


Then I applied a broader -1.0 grad ND to darken the sky:


This trick allows one to create quite complex gradations. I added a tiny tweak of the curve and added a little clarity and vibrance and saturation.

Here is the final result (large in the link):

Canyonlands dusk

Tuesday, July 29, 2008

Lightroom 2.0

Lightroom 2.0 was released yesterday and I immediately downloaded the upgrade even though I have been very very busy with other things. Let me say that I am quite astonished by the release even though I knew what was to be expected in this. Just a list of things I was hoping for and whether they are in LR 2:

- electronic grad ND filters: One of the few reasons I have to go to Photoshop stil and a very longheld wish of mine. check
- Paint-in adjustment masks for exposure, sharpening, saturation, etc. check
- export to arbitrary color profiles in the export dialog: check
- pervasive output sharpening: check And it is superb!
- Better color rendering for reds, yellows, and oranges: check if you use the beta camera profiles. More on this later and why this is so exciting.
- Print to jpeg: check! It now even copies over the copyright notice into the metadata!
- Better file organization: check

Stuff that didn't make the cut but that I'd really love to see:
- Soft proofing. Obviously this is a major wish. This is hard to get right though.
- Book making facility. This is one area where Aperture really shines.
- Built-in backup facility.

About the new DNG profiles. I think this is a major advance that cannot be underestimated in its importance. Lightroom and ACR always had this issue where you could not get both skin tones and reds and yellows right at the same time without resorting to tricks. These new profiles provide beautiful colors and provide color rendering (if you like that) very close to the camera jpeg.

Here is an example: Young photographer loves colorful flowers:

This is the ACR 4.4 default rendering:


This is what people complain about. Ugly skintones, dull yellows and reds, etc. In this case, the image appears underexposed too, which it really wasn't

Compare this to the default Capture NX rendering (same as the camera jpeg)


As you can see, far better skin tones and more accurate yellow.

This is the rendering with the camera default beta profile:


That is superb. Great skintones and beautiful yellow. The yellow is actually nicer than in the CNX image.

Now to really optimize this, I used the camera vivid profile and increased the vibrance and saturation to 10 to get this image:


This really exemplifies the almost fluorescent quality these flowers had in real life. It also gives the nice warm tones that were present in the sunset light, even when using the daylight white balance! The difference with the ACR4.4 rendering is stunning. I'd recommend anybody to download the new profiles and try them out! I have to stress here that apart from slightly nicer reds and yellows, it makes very little difference for my D300. The difference with my older D50 (images above) are very large as you can clearly see.

Sunday, July 27, 2008

Places to get back at sunrise

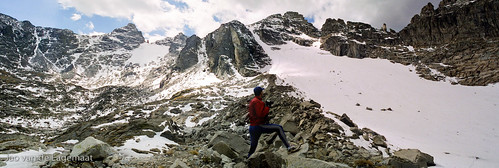
One place I'd really like to go back to at sunrise is Isabelle glacier. This is a beautiful glacier in the Indian Peaks wilderness (Bigger in the link). I was there some years ago and shot this on film. You can actually see two glaciers in this image.

Isabelle Glacier Panorama


The problem is that one has to start hiking around 3 to 3:30 am and I have not been able to get myself to do that recently. Along the hike here, there are many gorgeous points such as this tarn that is fed by the two glaciers. Along the hike there are also numerous gorgeous waterfalls worthy of long-exposure shots.

Tarn


Here is another shot near the glacier. You can actually see two people hiking up the glacier to ski down it a little later. They are especially clear in the larger image in the link.

Glacier


From around the same starting point, you can also reach this amazing lake called Blue lake:

Blue lake and Boulder


Unfortunately, this valley is oriented wrong for sunrise images, except maybe later in the year when the sun rises more southernly on the horizon. Perhaps if one times it just right just before the big snowfalls it is doable. There are more images from the Indian Peaks Wilderness in my flickr stream.

Friday, July 25, 2008

Columbine flies

One funny thing about Columbines is that many of them will have these strange little flies in them. I don't know what the (symbiotic?) relationship gives them but it is funny that such a beautiful flower harbors these insects. Here is a detail from one of Saturday's shots (click for 1:1), where you can see them clearly:


The leaves on some of the Columbines looks blurry because the wind was blowing like crazy.

Wednesday, July 23, 2008

Sunset in Mayflower Gulch

I went shooting at sunset with Ben (gorgeous website here) and Dave. Ben's images had been an inspiration for me for a while so that was fun. Both Ben and Dave had shot in this location before but I had only been there to ski in the winter, so this was a revelation. Seas of wildflowers! You can see all images in my Rocky mountains set on smugmug or in the flickr set. The links behind the images go to the smugmug pages where you can also order prints as always. For the social networkers, visit my flickr set on this. Here are the first few I liked.

A classic near/far image with Columbines in the foreground:


Columbines and rocks:


Yellow paintbrushes:


Columbines on a ledge overlooking the basin:

On the enlargement (click the image) you can actually see the insects that like to sit inside the columbines.


More in the next post! Including some amazing sunset shots!

Thursday, July 10, 2008

Kayakers on Clear Creek in Golden

Last Tuesday I went to shoot some pictures of the Kayakers that are stunting on Golden's Clear Creek most of the summer. These people are fun to watch. I've tried Kayaking before but was constantly bailing out because contrary to quiet water, I could rarely get myself upright again after flipping in even slightly more rapid stuff. Fun, but cold sport. I shot all in jpeg on my D300 and as always focus and exposure were basically perfect everytime. Quite amazing. This is just a tiny subselection of the images I shot:


There are far more images on the smugmug gallery. See the whole set here as a slideshow on smugmug.
If you're a flickerite, a subset is found on my flickr pages here.

Sunday, July 6, 2008

Emerald Lake Panorama

From a dawn hike in October last year, here is a panorama of Emerald Lake in Rocky Mountain National park. I redid this handheld panorama using the technique I described yesterday. In a version I made at that time, I had simply painted in an adjustment layer to brighten the foreground. This time, I developed each image four times, exported the total of 4x9=36 images, and took them into hugin 0.7. In hugin, I created anchor points in groups of 4 using the panomatic searcher and then connected each group together by connecting the main (normally exposed) images. I also told hugin that these were groups of different exposures. I then stitched and enfused (all automatic) the whole thing in a cylindrical projection, ending me up with a 50 Megapixel image after cropping.I think this is gorgeous even if I say so myself! Also see the flickr page on this. This image should print very sharp even at 60x40 inches.


Saturday, July 5, 2008

Contrast reduction that doesn't yield sucky images

One of the things that's all the rage on the net is doing contrast reduction using HDR (high Dynamic Range) software. The problem with most of the software meant to do this (Photomatix, Photoshop, etc.) is that it yields terrible images without a lot of tinkering. In redoing some panoramas I discovered that the newer versions of Hugin contain a revolutionary and simple method called enfuse of doing this that yields superb results with no tinkering. There are also some standalone droplet apps that you can use. For other GUIs check out this page. For this tutorial I'll use a program called Xfuse (see link above) that for some reason is no longer downloadable and I'll start at a single RAW image. The image I chose is of the Moses and Zeus formation in Canyonlands National Park, shot from Taylor canyon backlit at sunrise using default development in Lightroom.


As you see, blown-out sky, and underexposed foreground. Pretty boring! SO what I do is develop this file in three different ways and output the result to a jpeg in adobeRGB. This way you can set different white balances for the shadow portions and the sky portion. Here for example is the image developed for the shadows (click link for bigger):


I used shade for the white balance and boosted vibrance and saturation slightly.

Here is the same for the sky:

You can see I used a white balance between daylight and cloudy and I dropped exposure two stops and boosted contrast and brightness. I would recommend correctly exposing it to begin with, but you can see that an amazing amount of structure can be rescued from the RAW.

Now I drop those files into Xfuse (or use any other enfuse frontend):


and let it do its job. The end result is a nice tiff that I reimport into Lightroom and edit just a tad. Here is the final result that could still use a little added contrast:


What I like about this method is that it does not look like HDR at all (no sucky haloes). You can also do this when you have actual multiple exposures and you'll get even better results than this. I have often done similar stuff by just painting exposure masks in Lightroom or Photoshop (adjustment layers) but this seems almost magical in how well it works. I even put the image on my smugmug pages. Check it out! I like the diagonal symmetry of the rock formation with the waterpuddle.

Rediscovery

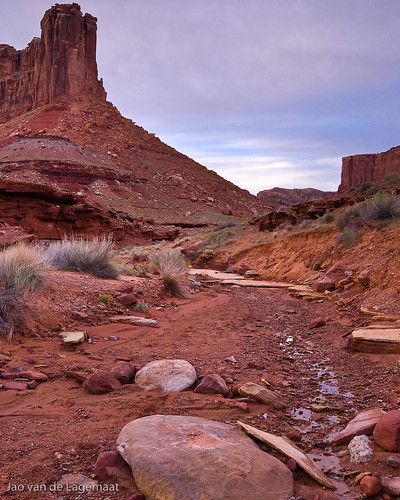
I've been rediscovering some old images I shot a while ago. Among these are images I shot in Canyonlands national park on a multiday bike trip. Here is one example,


Here is a shot of a rock in dried out river.

river rock


Here is the complete set of the canyonlands images including the older stuff.

There are hundreds of good shots in these archives that just didn't make the cut originally. My eye has developed differently now and I discover new things in these shots that I hadn't seen before. I am working on some interesting stuff with my older panoramas that I'll post on soon.